RAINMETER WORKSHOP
When I first started using Rainmeter I scoured Deviant Art for skins that fit what I was looking for. I didn’t find any. So I ended up dissecting skins, reading the help file, and discovered that it’s not nearly as complicated as it looks.
The goal of this series is to show how easy it is to make your own skins. I’ll be showing simple skins and code and talking about everything from basic skin creation to some of the more complicated things you can do with Rainmeter.
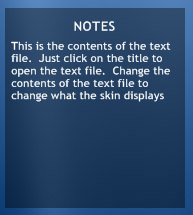
MAKING A NOTES SKIN
The skin I’ll be demonstrating is probably the simplest notes skin you can create. The skin is fundamentally made by combining different blocks of code. Each block as its own unique name. Each block of code is either a Measure or a Meter. Measures can be thought as a piece of code that stores information, and a Meter is one that displays something. The skin also shows the use of several different features, all of which I’m going to explain. These features are MeterStyle and position formulas. All skins are made up of two different types of blocks, meters and measures.
To make this code work, open up Notepad or similar program (I use Notepad++) and save the code in a file named Notes.ini in the Rainmeter Skins folder in your Documents. In the same folder you saved
Notes.ini
in, save a file named
notes.txt
. Write something in the text file. “Hello World” would be good. It helps to have file extensions turned on.
[Rainmeter]-In this section you can define the Update rate, Author, and few other things that I never use.
[Rainmeter]
Author=Varelse
Update=1000
[Variables]
This section contains all the variables I’ll be using in the skin. WIDTH and HEIGHT are the dimension of the background image. NOTESPATH tells Rainmeter what text file to read the notes out of. The next several define the size, font, and color of the text displayed. TITLE is the title of the skin, obviously.
[Variables]
WIDTH=180
HEIGHT=200
NOTESPATH=#CURRENTPATH#notes.txt
FONT=Trebuchet MS
TEXTCOLOR=255,255,255
FONTSIZE=10
FONTSIZE2=8
TITLE=NOTES
[MeasureNOTES]
This is the piece of code that tells Rainmeter to display the notes. As you can see, it references NOTESPATH. To reference a variable you have to enclose the variable name with
#VariableName#. FileFilter tells it to look for a text file.
[MeasureNOTES]
Measure= Plugin
Plugin= PluginsQuotePlugin.dll
PathName=#NOTESPATH#
Subfolders=1
FileFilter=*.txt
Separator=¶
[BackGround]
-The box that displays behind the text. SolidColor defines the color, in this case black, and transparency of the color. H and W are the height and width.
[BackGround]
Meter=Image
X=0
Y=0
W=#WIDTH#
H=#HEIGHT#
SolidColor=0,0,0,100
[TextStyle]
-This is style section. It isn’t a meter or a measure. It’s just a section of code for other meters to reference. This style defines several parameters that are common to the Title and the Notes. This makes coding easier by being able to reference a block of code instead of having identical lines of code in different meters.
[TextStyle]
FontColor=#TEXTCOLOR#
StringStyle=Bold
AntiAlias=1
FontFace=#FONT#
FontSize=#FONTSIZE#
StringAlign=CENTER
[Title]
-Displays the title. Simple enough. It references [TextStyle], so [Title] has all the attributes that it does. Every meter needs an X and Y position. What’s interesting about this is how the X dimension is set. X= (
#WIDTH#/2) means that the Title will always be centered relative to the width of the skin. Of course, the position could have been any other number or formula. If you are using a position formula, it has to be in parenthesis, otherwise it won’t work. And formulas can be very complex if you want them to be.
[Title]
Meter=String
MeterStyle=TextStyle
X= (#WIDTH#/2)
Y=10
Text=#TITLE#
LeftMouseDownAction=!Execute ["#NOTESPATH#"]
[NoteText]
-Display what [MeasureNotes] reads from the text file. Since we want the text to be within the background we need to set the Height and Width dimensions of the meter. Y=5R which means it is five pixels below the meter above it. I went with a 5 pixel border, so the Width becomes (
#WIDTH#-10) and X=5. 5 pixels on the left and 5 on the right, so subtract 10 from the width of the background meter. Height wasn’t so easy. I basically had to guess and fiddle with it till I got what I wanted.
[NotesText]
Meter=String
MeasureName=MeasureNOTES
MeterStyle=TextStyle
X=5
Y=5R
H= (#HEIGHT#-40)
W= (#WIDTH#-10)
StringAlign=LEFT
FontSize=#FONTSIZE2#
ClipString=1
Questions? Comments? Ideas for new tutorials? Leave a comment.
For further reading and clarification on the options below each section, measure, and meter read the
Manual. For more on skin creation read
Rainmeter 101.